Outlook is a useful email client to send and receive emails.
You can add multiple email accounts on Outlook, and if you are our customer, Olive & Lake can add them for you free of charge. We can even do it remotely using AnyDesk.
We use IMAP accounts, a two-way system of storing your email data on your local computer and the hosting server.
You don’t need to worry about losing emails from your inbox by using IMAP. Olive & Lake’s web hosting offers email storage on a secure server at no extra cost to the normal hosting fee.
We always set up emails on Outlook for our customers, but if you want to do it by yourself, this article can help you. You will learn step by step how to connect your emails to Outlook 2019.
1. Create an Email on cPanel
First, you need to have an IMAP email account. You can create an account on your cPanel. If you don’t know how to do this, read this article “How to Create Emails on cPanel.”
We offer a fully managed hosting service, so we can do this for you and send you the details.
2. Open Outlook
Open Outlook on your computer and click on file on the top left menu.

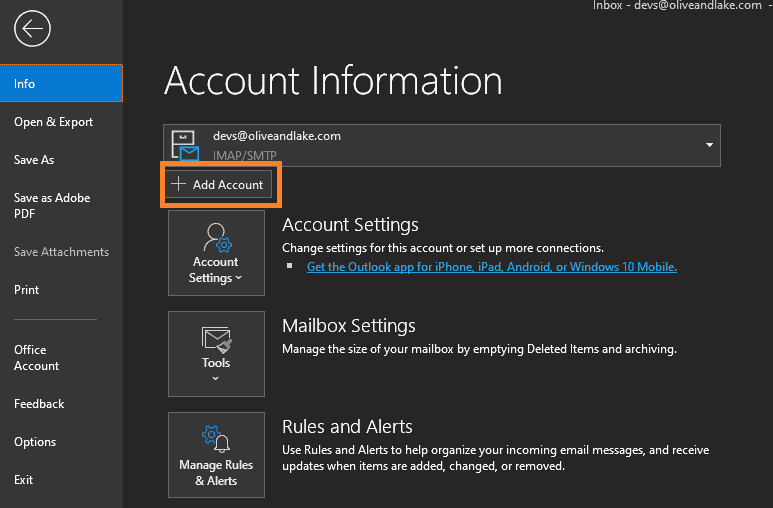
3. Add Account
Next, you need to add your account. You can click on “+Add Account” and a new window will appear.
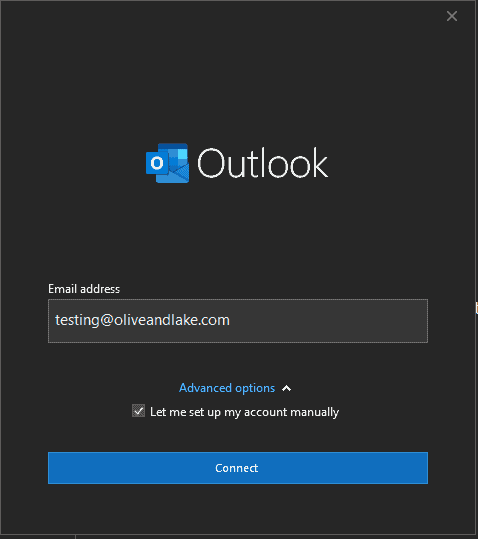
4. Add the Email
Add your email account. Type your email address into the box provided. Click on “Advanced Options” and check the box for “Let me set up my account manually”.
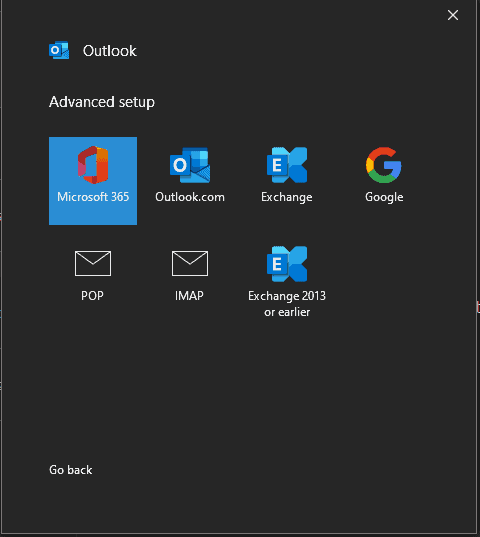
5. Choose IMAP
On the “Advanced Setup” screen, click on IMAP. We always recommend that you use IMAP over POP because IMAP offers a two-way sync.
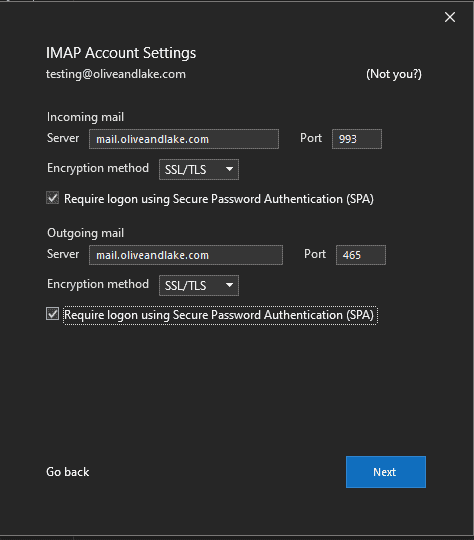
6. IMAP Setting
Set up the IMAP account setting. Enter the following setting. Change “yourdomain.com” for your domain name. It’s important that you enter the details correctly because if you have a mistake, your emails won’t work. When you have entered the details, click “Next”.
Incoming Mail
Server: mail.yourdomain.com
Port: 993
Encryption method: SSL/TLS
Outgoing Mail
Server: mail.yourdomain.com
Port: 465
Encryption method: SSL/TLS
Olive & Lake offers free SSL with all of our customers’ hosting accounts.
7. Add Password
Now, add the password and click “Connect” and Outlook will try to connect. If there are any problems, Outlook will notify you that it cannot connect to the mail server. Go back and check your incoming/outgoing server settings, your email address and your password.
If you still cannot connect, please contact our support team and we’ll take care of it for you.

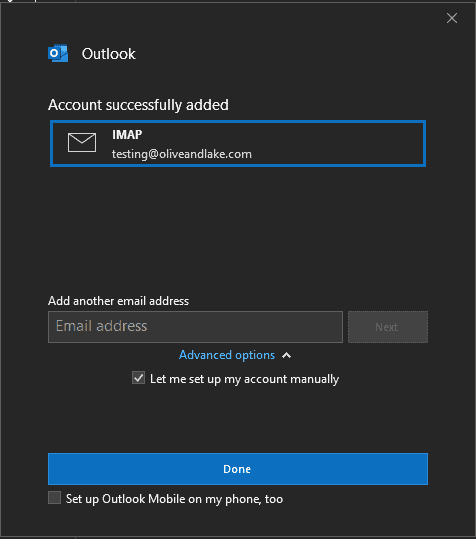
8. Account Added Successfully
Finally, the account has been added successfully. Now you can manage your email from Outlook. Click Done!