If you’re using Microsoft 365 for your emails when using hosting from Olive & Lake, you can follow these instructions to set up your domain on Microsoft 365. Olive & Lake do provide a fully-managed hosting service, so after you’ve setup your Microsoft 365 account, just send us the details and we’ll do this for you.
NOTE – Please contact us if you want us to create, setup and manage your Microsoft 365 account and we can do that for you too.
If you want to do it yourself, follow the instructions here.
Sign in to your Microsoft 365 Account
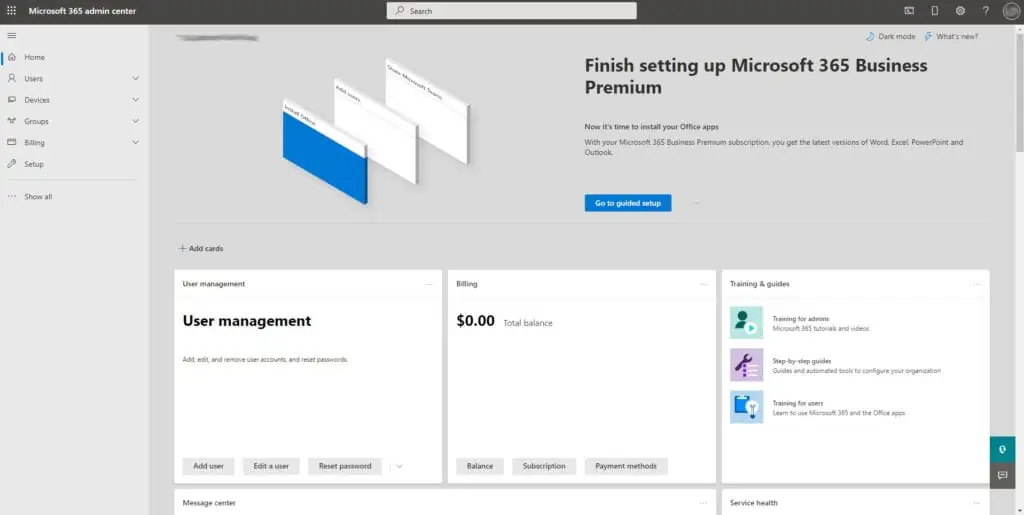
Go to https://admin.microsoft.com and sign into your admin account with your username and password. After successfully logging in, you’ll be in the dashboard of your Microsoft 365 Admin Center.
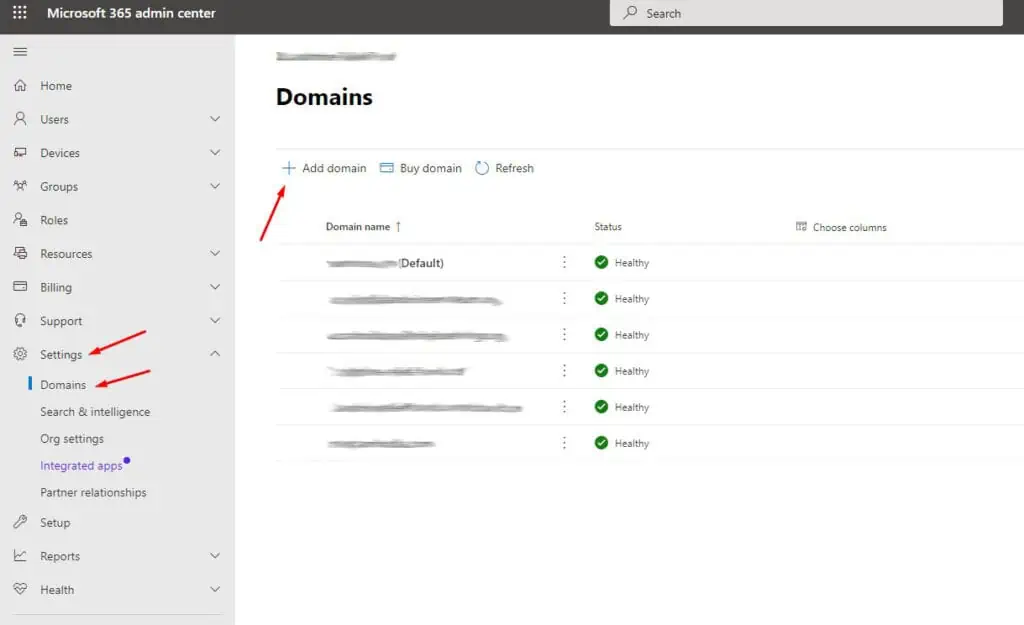
Click on Add Domain
On the left side menu, click on “Show all and then click “settings” and “domains”. Then click on “Add domain”.
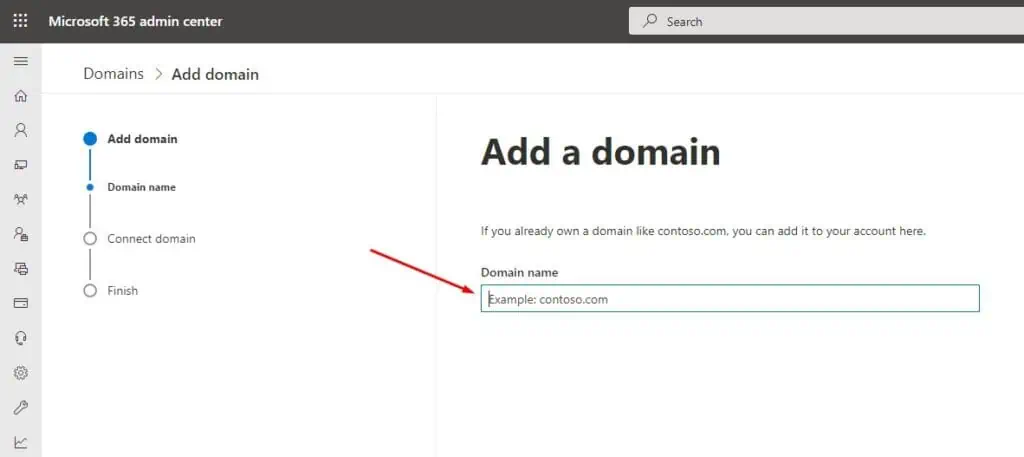
Enter your Domain Name
Write your domain name in the field and click “Use this domain” at the bottom of the screen.
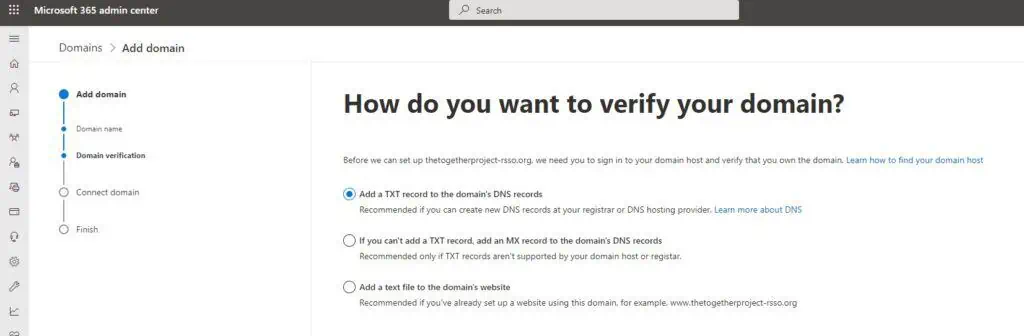
Add a TXT Record
Select “Add a TXT records to the domain’s DNS records” and click “continue” at the bottom of the page.
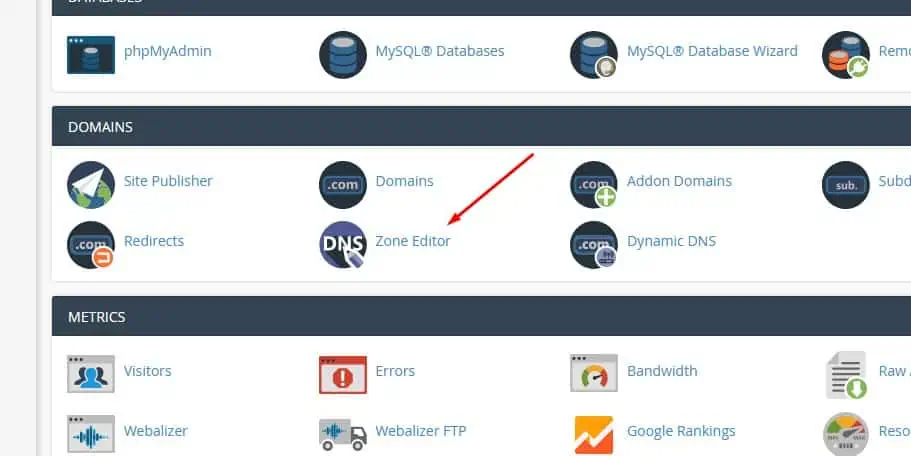
Log into your cPanel and Add the Record
See our knowledge base article, “how to login to cPanel“.
Go to Zone Editor.
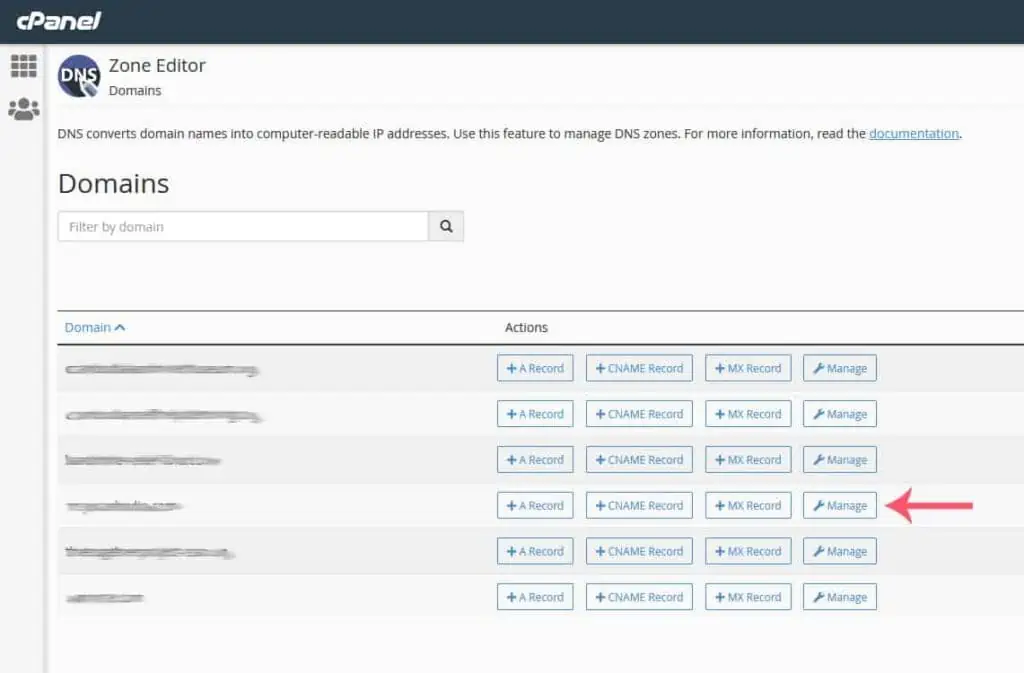
Click on the “manage” button for the relevant domain.
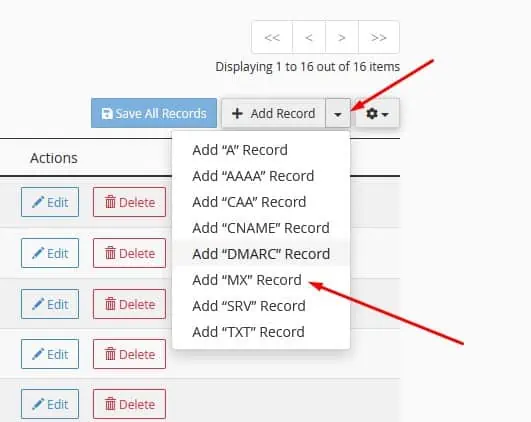
Select the Dropdown arrow next to “Add Record”.
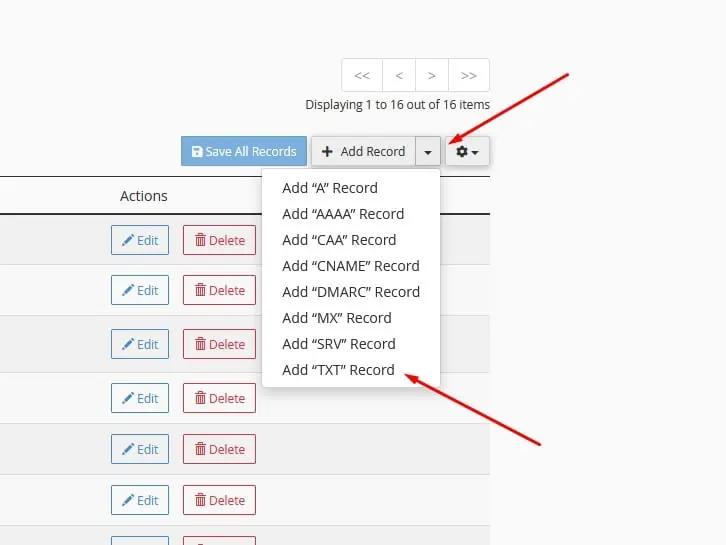
Copy the TXT Value from your Microsoft 365 Admin Center which should start with MS=ms and paste that into the “Record” section in the Zone Editor in cPanel.
Enter your domain name followed by a full stop in the name. For example “mydomain.com.”
Enter 3600 for TTL.
Click “Save Record”
Verify Domain
Go back to your Microsoft 365 Admin Center and then click “Verify” at the bottom of the page.
If you have done everything correctly, you should have successfully connected your domain.
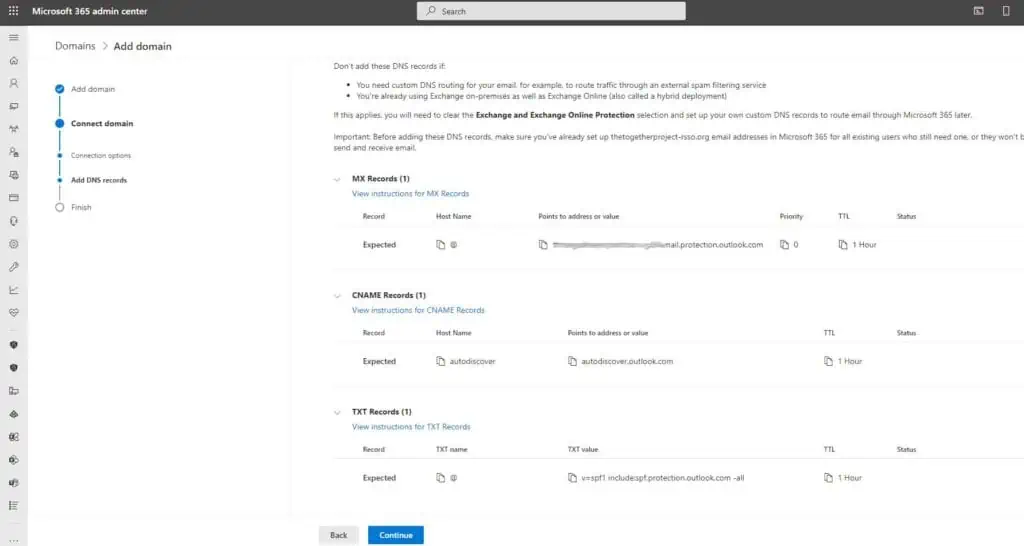
Get DNS Records for your Email
Next, you’ll need to add a few more DNS records to your zone editor to setup your emails correctly.
You’ll need to add the following records:
- MX Records
- CNAME Records
- TXT Records
All the information is provided to you on the next screen.
Add DNS Settings in Zone Editor
Go back to cPanel.
First, remove any current MX records for the relevant domain.

Click the down arrow next to “Add Record” and add a new MX record.
In the zone name, enter your domain name followed by a full stop. For example, “mydomain.com.”
Enter 3600 for the TTL
Enter 0 for the Priority
Copy the value from Microsoft 365 Admin Center and paste it into the destination.
Click “Save Record” when you are done.

Now, you need to add a CNAME record. Again, the settings you need are in your Microsoft 365 Admin Center.
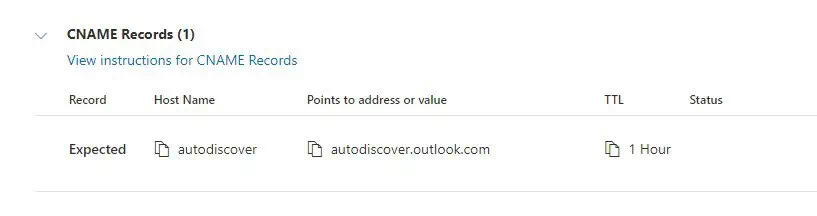
In cPanel, select CNAME record from the drop down list next to the “Add Record” Button and enter the details.

Click “Save Record”
Finally, you’ll need to edit your SPF Record.
In cPanel, find your current SPF Record and click “Edit”.

Change the TTL to 3600 and then delete the current SPF record and paste in the new record from Microsoft.

Click “Save Record”
Verify Settings in MS 365
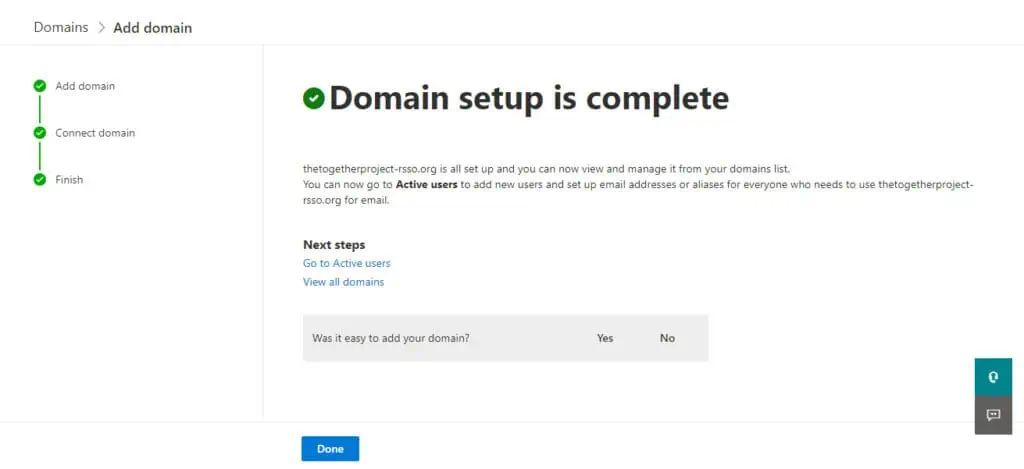
After you have added all the correct records above, go back to Microsoft 365 Admin Center and click “Continue”. Microsoft will check the new DNS records.
If everything has gone well, you should get a message saying “Domain Setup is Complete”.
Click “Done” and you can now start using Microsoft 365 for your Emails.